BlueM.Sim application
Jump to navigation
Jump to search
![]() BlueM.Sim | Download | Application | Theory | Development
BlueM.Sim | Download | Application | Theory | Development
This page is an aid to the application of BlueM.
Dataset
- A BlueM.Sim dataset consists of several text files. The minimum requirements are an ALL-File - (general options) and a SYS-File - (System Plan). Furthermore, files for describing the different types of system elements must be included. All files must have the same filename (which is also the name of the dataset), only the file extensions differ. (The name of the dataset should not be longer than 32 characters! See Bug 13)
- A QGIS plugin for creating BlueM.Sim input files, developed by Martin Grosshaus as part of his Master Thesis, is available on GitHub: https://github.com/bluemodel/BlueM.QGISInterface
- It is possible to create a dataset using TALSIM, which can then be exported and used for BlueM.Sim. Minor modifications to the export files need to be carried out (see TALSIM Export).
See also Input files
Simulation
Releases starting from 0.9.1
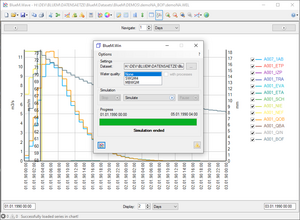
For individual simulations, it is easiest to use the BlueM.Win package.
- Download the precompiled package
BlueM.Win.zipand unzip. - Start the program
BlueM.Win.exe - Select a dataset
- Start the simulation
- After successful simulation, view the simulation result in Wave.
The computational core (bluem.dll) can be controlled using the API of the BlueM.DLLAdapter.
Using BlueM.Sim with OpenMI
You need an OMI file, an example of which is provided below:
<LinkableComponent Type="IHWB.BlueM.OpenMIAdapter.BlueM_LinkableComponent" Assembly="D:\BlueM\IHWB.BlueM.OpenMIAdapter.dll">
  <Arguments>
    <Argument Key="FilePath" ReadOnly="true" Value="D:\Dataset\demoNA" />
    <Argument Key="AnzahlInterneZeitschritte" ReadOnly="true" Value="5" />
    <Argument Key="Guetemodell" ReadOnly="true" Value="false" />
    <Argument Key="Guetemodell_Abbauprozess" ReadOnly="true" Value="true" />
    <Argument Key="Guetemodell_Dispersion" ReadOnly="true" Value="false" />
    <Argument Key="Guetemodell_Merge" ReadOnly="true" Value="false" />
    <Argument Key="Simulationsanfang" ReadOnly="true" Value="28.12.1967 00:00" />
  </Arguments>
</LinkableComponent>
The directories have to be modified to point to the correct locations on your computer.
Explanation of the argument keys:
Location of the dataset (path and filename without ".ALL")
<Argument Key="FilePath" ReadOnly="true" Value="D:\Dataset\demoNA" />
How many internal timesteps within one OpenMI timestep
<Argument Key="AnzahlInterneZeitschritte" ReadOnly="true" Value="5" />
Use the water quality model (SWQM)?
<Argument Key="Guetemodell" ReadOnly="true" Value="false" />
Use degradation processes in the quality model ?
<Argument Key="Guetemodell_Abbauprozess" ReadOnly="true" Value="true" />
No effect yet !
<Argument Key="Guetemodell_Dispersion" ReadOnly="true" Value="false" />
<Argument Key="Guetemodell_Merge" ReadOnly="true" Value="false" />
Start date of the simulation:
<Argument Key="Simulationsanfang" ReadOnly="true" Value="28.12.1967 00:00" />
Release 0.9
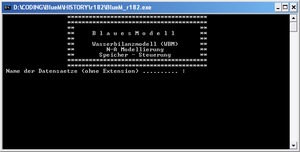
- In the simplest case the compiled EXE file (BlueM.exe) is in the same directory as the dataset to be simulated. In this case, simply launch the EXE and then enter the dataset name.
- You can specify the name of the dataset directly as a parameter to pass to BlueM.exe
C:\WorkingDir>"path\to\BlueM.exe" datasetname
- To prevent the window from closing immediately when the simulation is finished or an error has occurred, a shortcut to BlueM.exe can be created. In the properties of the shortcut enter the following "target":
cmd.exe /K "path\to\BlueM.exe"
- Also, specify the working directory as the directory in which the dataset is located.
Results
- Depending on the settings, BlueM.Sim creates different result files. By default, the main results are written to a WEL-File.
See also output files
Errors / warnings
- Errors cause the simulation to stop and must be remedied. All errors are logged to an *.ERR file in the dataset directory. The *.ERR file contains the date and time of the simulation in the filename and is preserved until deleted by the user. The error messages sometimes contain error constants.
- Warnings that occur during the simulation are also logged to a file ($WARN.TMP), which is deleted each time a new simulation is started.

