BlueM.DLLAdapterTest: Difference between revisions
Jump to navigation
Jump to search
(add section about reference to nunit.framework and change recommendation to install the msi) |
(update to MSTest unit testing framework (since r182)) |
||
| Line 1: | Line 1: | ||
{{BlueM_nav}} | {{BlueM_nav}} | ||
'''BlueM.DLLAdapterTest''' is an assembly for running unit tests for [[BlueM.Sim]] and [[BlueM.DLLAdapter]] | [[File:BlueM.DLLAdapterTest_VS2019.png|thumb|right]] | ||
'''BlueM.DLLAdapterTest''' is an assembly for running unit tests for [[BlueM.Sim]] and [[BlueM.DLLAdapter]] within Visual Studio. | |||
==Running tests== | ==Running tests== | ||
In Visual Studio, open the ''Test Explorer'', which will autodetect the tests defined within the loaded project. | |||
You can then run all or just individual tests. To debug tests, right-click on a test and select ''Debug Test'' or choose ''Debug All Tests'' from the main ''Test'' menu. | |||
==Writing tests== | |||
To write new tests, copy the pattern of the already existing tests or read the documentation here: https://docs.microsoft.com/en-us/visualstudio/test/unit-test-your-code?view=vs-2019 | |||
[[Category:BlueM.Sim Development]] | [[Category:BlueM.Sim Development]] | ||
Revision as of 05:04, 1 June 2020
![]() BlueM.Sim | Downloads | Application | Theory | Development
BlueM.Sim | Downloads | Application | Theory | Development
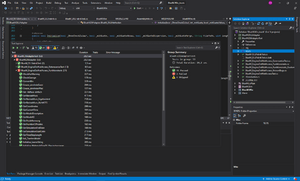
BlueM.DLLAdapterTest is an assembly for running unit tests for BlueM.Sim and BlueM.DLLAdapter within Visual Studio.
Running tests
In Visual Studio, open the Test Explorer, which will autodetect the tests defined within the loaded project.
You can then run all or just individual tests. To debug tests, right-click on a test and select Debug Test or choose Debug All Tests from the main Test menu.
Writing tests
To write new tests, copy the pattern of the already existing tests or read the documentation here: https://docs.microsoft.com/en-us/visualstudio/test/unit-test-your-code?view=vs-2019
